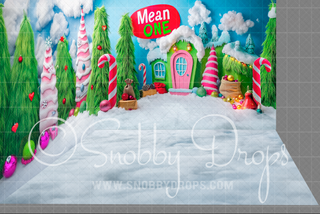
DIY backdrop Room Set: 3-Piece Setup Step-by-Step
Are you looking to breathe new life into your portrait sessions, create a dynamic studio space, or simply elevate your photography workflow? Setting up a diy backdrop room with backdrops can be the creative spark you need. In this comprehensive guide, we’ll walk you through a diy backdrop room set: 3-piece setup step-by-step, sharing actionable photography ideas and studio backdrop inspiration ideal for portrait photographers, studio owners, and creatives. Discover how to transform any space into a versatile photo haven—and learn how Snobby Drops can help you unlock even more potential.
Why Creating a DIY Backdrop Room Set Matters
Every creative photographer knows the struggle: limited space, stagnant backgrounds, or expensive rentals. The right diy backdrop room backdrops can turn a simple room into a versatile studio, saving you time, money, and creative energy. More than just a solution to space constraints, a thoughtfully designed 3-piece setup will:
- Expand your creative options—quickly change moods and styles between sessions.
- Increase efficiency—switch out backdrops on the fly for different looks without major resets.
- Impress clients—offer a full-service, professional experience in a small or home studio.
This approach is especially vital with the rise of at-home photography businesses and boutique studios. Customers value variety, and a diy backdrop room set: 3-piece setup step-by-step ensures you’re always ready for the next shoot. Plus, with inspiration from platforms like Pinterest backdrop trends, your sessions can stay fresh and on-point.
Key Ideas & Examples: Step-by-Step 3-Piece Backdrop Room Setup
Step 1: Analyze Your Space & Choose Key Areas
Begin by evaluating your available studio or room. The goal is to carve out three distinct backdrop zones. For small studios or spare rooms, look for:
- Open wall space with enough floor area for your subject (ideally 6-8 feet wide)
- Corners or nooks that could serve as impromptu staging areas
- Windowed walls for natural light or blackout curtains for controlled lighting
Step 2: Select Your Three Backdrop Types
Your diy backdrop room backdrops should offer different textures or moods. A popular combination may include:
-
Solid Color Fabric or Paper Backdrop
Example: Crisp white, timeless gray, or bold color for clean headshots. -
Textured/Mural Style Backdrop
Example: Painted canvas with subtle textures, classic brick, or vintage patterns for editorial flair. -
Patterned or Seasonal Backdrop
Example: Floral prints, holiday themes, or abstract art for on-trend seasonal shooting.
Pro Tip: Check out the Snobby Drops Tutorials & How-To collection for backdrop inspiration that matches your signature style.
Step 3: Install & Arrange Your Backdrops
Here are steps for setting up your diy backdrop room set: 3-piece setup step-by-step:
- Mount sturdy support systems (adjustable stands, wall-mounted hooks, or rolling frames) to make changing backdrops seamless.
- Iron or steam out wrinkles on fabric/canvas before installation for a professional look.
- Label or color-code each area for quick identification during shoots.
- Test lighting in each zone: daylight, strobes, and continuous to see which area favors certain backdrops or styles.
Step 4: Enhance with Props & Accessories
Each backdrop zone can be accented with:
- Stools, chairs, or posing blocks that complement each background’s theme
- Portable plants or decorative items for quick mood shifts
- Lighting modifiers—reflectors or gels add dimension and color
See how modern portrait pros design their studio spaces on the Professional Photographers of America (PPA) resources or top photography blogs for even more inspiration.
How to Use Backdrops for Maximum Impact
A diy backdrop room backdrops setup is more than just a static background—it’s an interactive part of your creative process. Here’s how to get the most from your 3-piece arrangement:
1. Efficient Workflow for Busy Sessions
Set up your camera tripod facing the first backdrop and shoot all clients who need that look. Then, simply pivot the camera to the next backdrop zone or rotate your backdrop roll. This streamlines large family sessions, mini-shoots, and commercial headshots.
2. Storytelling with Visual Variety
Use different backdrops to tell a narrative or transition between moods. Start with a neutral background for timeless portraits, move to a rich textured wall for dramatic editorials, and finish with a lively patterned setup to showcase playful personality. This approach creates a robust, multi-image gallery from a single session.
3. Customize Each Backdrop with Lighting
Your diy backdrop room set: 3-piece setup step-by-step shines brightest when paired with creative lighting. Use softboxes for high-key looks, grids for tight drama, or gels to alter backdrop ambience—all without changing your physical setup.
4. Provide More Value for Clients
Multiple backdrop options allow clients to choose their preferred styles. For studio owners, this flexibility means you can capture senior portraits, family photos, personal branding imagery, and seasonal marketing all in one sitting, maximizing profitability per session.
For additional information about optimizing backdrop area sizes for various applications, see our in-depth Backdrop Size Guide.
Studio Backdrop Inspiration: Trending Photography Ideas
Looking for the next big look? Keep your diy backdrop room backdrops setup on-trend by integrating ideas from:
- Pinterest studio backdrop boards for color palettes and prop inspiration
- Editorial photography magazines for lighting setups and poses
- Industry workshops and webinars for emerging styles and configurations

Snobby Drops Product Tie-In: Elevate Every Setup
Ready to make your space truly standout? Snobby Drops offers professional-grade, easy-to-install backdrops designed for both efficiency and artistry. Here’s how Snobby Drops can revolutionize your diy backdrop room set: 3-piece setup step-by-step:
- Premium Materials: Durable, wrinkle-resistant fabrics and hand-painted textures crafted for vivid final images.
- Versatile Collections: Options range from classic solids to artistic murals—ideal for every portrait style and photography niche.
- Quick-Change Systems: Efficient mounting solutions and sizing mean you can swap looks in minutes—even in tight spaces.
Browse our Tutorials & How-To collection for in-depth guides on backdrop care, studio configuration, and creative setup ideas directly from seasoned photographers.
Real Studio Success Stories
Snobby Drops has empowered thousands of photographers to transform ordinary spaces with extraordinary results. From solo creatives running a home portrait studio to bustling commercial operations, these setups are proof that curated backdrops can unlock a new level of professionalism and artistic freedom.

Conclusion: Level Up Your Studio with a 3-Piece DIY Backdrop Room Set
In a world where standing out is essential, a well-planned diy backdrop room backdrops arrangement can turn any space into a powerhouse of creativity. The diy backdrop room set: 3-piece setup step-by-step method lets you deliver more value, book more sessions, and explore new styles with minimal space and maximum impact.
Inspired to start your own transformation? Explore Snobby Drops Tutorials & How-To collection today and unlock the full potential of your studio with new photography ideas and studio backdrop inspiration.


